Sunday, 3 July 2011

Good Times at The Cathedral, 2011 Assen TT (Rossi exclusive snaps :)

Assen was a blast, as was the stop over in Bruges/Brugges on the way home. We had mixed sun and showers on the 400 mile journey there, grey and drizzle at the races in Assen, baking hot in Belgium, mother of all rain storms on last bit of journey back home on UK motorways. When I say the mother of all storms I mean 20 meter visibility, hail, 2 inches standing water, multiple lightening forks across the horizon, Gatwick airport brought to standstill, some poor soul in a crane killed at the Olympic Park.

Practice day and race day were given extra icing on the cake due to VIP Paddock Passes (thanks and love to my bro-in-law,and his friends who kindly sorted it for us. Hope Senor N is back to good health). Managed to play paparazzi for a laugh, and waited 20 mins for a 20 sec fly-by from Valentino Rossi after his disappointing practice session. It was straight into the trailer, but he smiled and waved on the way.


We were in with a great crowd on the same TT trip package and had a laugh at the hotel and on trip to the Assen street parties on the Friday night. Retired pretty early though as not getting any younger and was still feeling theAs mu! Old aircooled Multistrada, or if I could afford it I would love the KTM 990 SMT. As usual Mrs Cutter was up to every challenge on her 695, but no fairing meant 80mph was the maximum cruising speed on our 800 mile round trip.

Assen TT coincided with a Yamaha anniversary of 50 years in GPs, and they brought along some legendary bikes and riders (Phil Read, Ago etc)... The old bikes are uber cool and were so beasty they had to be locked up:


Here's what they sounded like when they were set free:


When the 125's finish this year that will be it for two stroke noise and smell. Still Moto3 could be cooking - the new Honda Moto3 bike was on show in the paddock:


Here's a shot of Simo in the pit lane, one of the occasions when he was shiny side up. The guy needs some luck and to calm down a bit and then he will clean up.... If he can do it maybe he's the next Rossi, maybe a Senna for the biking world (see that movie BTW).


We went with a MotoExpress package which meant a nice hotel and coach laid on to practice and race day, so a few beers could be consumed during the day as well as in the evening. Others on the trip were all really friendly, open, great people (as is so often is the case with bikers). Hope the friends we made all got back home safe and sound.

Don't need to say much about the results, Cheered Bradley's podium on noisely in the Paddock Bar, (which is directly on pit lane entrance, overlooks start finish straight and has view of chicane), over Dutch rave oom-pah music.

Watched Simo and Lorenzo collide from Strubbel grandstand for the main race. Bad luck for Crutchlow, and Ducati still struggling. Mugello on TV today - fingers crosssed - ho hum. Back on topic of the next post.

Wednesday, 22 June 2011

Tomorrow we rise at dawn - to Assen!

.....but in the mean time, despite kind comments from dear friends The Seat Ain't Right!!!

I have ordered some different vinyls as I am sticking to some sort of brown leathery look for now. If I can't get it right I may have to surrender and go black.  The seat Lee, from Viking Seats, made to my choice of design is great  - until I put it on the Chicken Shack Ducati. It's too fussy for the bike's colour scheme and the tan colour is too light. My fault not Lee's in any way of course.

Anyway Mrs Cutter and I are riding the 695 Monster and VTR1000 to Assen for the MotoGP and then stopping in Belgium on the way back. Looks like we may get as wet as we did going to Silverstone a couple of weeks back.  On the plus side we have VIP passes due to very kind friends and relatives, and Rossi has a new incarnation of the Ducati to ride, Crutchlow should be healed enough, and Simoncelli is due to keep it right side up for a change. Should be massive - see ya on the other side!

Sunday, 5 June 2011

Please Be Seated....

Big news from the 'shack is I have my custom seat!


The cover was made and fitted while I waited by Lee of Viking Seats:


Outstanding work at a very reasonable price. Lee is very friendly and will discuss what you want for your seat and contribute ideas. I wasn't able to find a vinyl that was quite as "distressed saddlery leather" as I wanted, and Lee suggested black and tan to break the colour up a bit. He also suggested the use of a synthetic suede-style for all or part of the seat. In the end I asked for black suede-style, and ribbing on the actual seating area, and tan leather-look vinyl on the rest, with double stitching. The problem of the 70's-style ribbing flare-ing out near the tank was solved by Lee putting in a "neck" section that works really well, wrapping around the rear of the tank.

The seat looks a bit new and needs to get a bit "lived in", and I'm thinking about a way to age the tan sections a bit, but I'm really pleased with it. I would definitely recommend Lee, whose prices are really good despite the high level of service. As well as a seating area with bike mags, just across the yard is a reallyu pukka cafe - best fresh cooked chips I've had for a long time! If you need to to talk to someone in the South East about any sort of seat customising, I can't recommend Lee highly enough. Like Boyz Toyz for the paint, I shall be back for subsequent projects. Find Lee's site here:

http://www.vikingmotorcycleseats.co.uk/
Other news - what's left before project is finished I hear you ask:

Brackets for front mudguard
Bracket for numberplate
Decisions about, purchase, and fitting of, indicators and rear light.
Mounting exhausts (can't find exhaust stud nuts so need to order some new ones)
Brackets for exhausts
Solve problem of Oberon M900 brake lever seeming to not fit alleged 916 unit when they should apparently be the same. Getting help and advice from Steve at Oberon which is much appreciated.
Fit front calipers
Sort side stand warning light
Establish why sprocket studs still seem a little too close to swingarm - bit of a worry this one...
Route Motogadget wiring tidily, mount speed sensor (fabricate bracket as necessary)
Mount motogadget microswitch or buy amd mount slightly less teeny switch.
Sort out some kind of shortened rear hugger, and underseat splash plate,
Fix on seat catch and get it to work tidily possible without locking unit. Although with new seat might be better it was lockable, or bolted on.
Solder on broken neutral sensor wires, tighten sensor nut which is recessed (have made a tool out of duplicate spanner using my fab Black and Decker power file)


Put on tank fittings
Put in oil and petrol and see if it actually runs...
Fix whatever doesn't work properly.

So I'm still singing the same old song - "there's a fair bit to be done yet"

I've been a bit lax lately - did manage to put together my first rivet link chain with loan of DID tool and advice from my mate Dan. That's something I'm glad I can now do myself.

Sunday, 15 May 2011

Brothers in the Build.

I've just finished watching a recording of the Le Mans MotoGP with Mrs Cutter, about 8 hours after it happened. What a race!  Ducati are on the podium with Rossi  having had a smart consistent push to third aided by carnage and confusion at the front.  Rossi, Burgess, and the Ducati team are doing what they said they would, developing the bike. This result became possible after some "chassis" (that's an archaic word for what is really a carbon airbox that holds the front-end, engine and rear-end together) mods, but Barcelona brings a new engine which Burgess has made clear is an important part of improving the behaviour in corners. If it has more power that won't hurt either. I won't talk about the ironies of the Simoncelli, Pedrosa and Lorenzo, Dovizioso dust-ups, other to say that I feel sorry for Dani but enjoyed watching Simoncelli stuff it up Lorenzo who has been playing the pious champion mind-games off the track. Anyway back to C-Shack business..

Last weekend was a milestone in terms of the project bike, not just because a particularly daunting (to me anyway) stage was completed, but more because of the manner in which it happened. A fellow UK Monster Owners Club member, Sam, had arranged to swap his Mivv X-Cone cans for my Sils. This was a deal made in heaven, with Sam lusting after the oval Sils he had wanted for a long time, now in a position to make use of them as he de-caffeinates his 620 for a change in riding position. In turn I got what I had been secretly longing for, pipes that are really different, with a real cafe-racer megaphone look mixed with a bit of modern GP vibe.

True, the brushed steel X-Cones are a fair bit heavier than the carbon Sils which seems a bit of a backward step performance-wise, but they are still a lot lighter than standard.  However, they look phenomenal. I was worried the back end was going to look cluttered and low with everything in black around the back wheel, These swept slim cans will clean things up no end without my having to resort to high-levels which inevitably look too modern for a cafe-a-like, and on a tail-chop bike need shortening.

The Silmotors :


The Mivvs :


They look longer when in position due to the link pipes which continue the line back to the manifold.

You may be wondering what was so special about all of this, and what was daunting about exhaust pipes. The answer is nothing, what was special was that Sam, as well as travelling a couple of hundred miles to do the swap, also decided to help me out with the wiring job for the Motogadget speedo and associated LEDs. Yep, the wiring that has been worrying me for so long. He spent several hours doing a class wiring job just as a favour to a fellow Monster owner. He even had to be forced to accept a little lunch - the chickens pinned him down while Mrs Cutter force fed him Spag Bol. I have rarely met such a polite, kind, hard working and talented bloke and I owe him big time.

The speedo, complete with it's micro switch, sensor, four internal warning lights, and the three extra LEDs I'm mounting (for the remaining required "idiot lights"), are all functional. All I have to do is tidy and route the wiring, put in a in-line fuse for the 12v supply, and bracket-mount the speed sensor and switch. The wiring was scarier than it looks below where it's pretty much finished, with some changes having to be made in the loom at the back end of the bike as well as at the front. However it wasn't at all scary for Sam, who pulled of the neat trick of making it look easy without ever making me feel like the talentless chancer I am!


More news just in, this weekend -  apart form sorting Kriega luggage for Mrs Cutter's 695 and my VTR, as well as a RAM mount and charging socket on the latter (all this in prep for Silverstone and Assen GP visits) -  I found some time to look at the final drive on the M900. I'd been uncomfortable with how close the sprocket nuts seem to be to the swing arm, and as usual instead of noting the obvious (studs seemed a bit short - how could that be?) I was making up all kinds of panicky theories. Powder coating affecting tolerances, 750SS sourced wheel not right, sprocket carrier different or not seating properly, spacer in the wrong way round, Resolving to play around with different sprockets and swap to the old carrier to see what was what, I realised I'd put the sprocket on the wrong way round - it has indentations on one side that allow the nuts to screw further down the studs. Just a couple of mm. difference but enough to now look right.

Wth everything going so well I decided to try and put the chain on, which really needs a side-plate pressing and rivet-end squashing tool. These usually come as a multi-function jobbie that breaks the old chain too. A bit of web searching came up with some alternative methods and I tried to improvise:

This is some kind of car tool which, with a socket used to keep it's jaws open, makes a good pressing tool. This would have been fine if the instructions on the chain packet had mentioned that you need to have the side of the plate with the writing on facing outwards ( it says "Japan" unlike every other link that says "DID"). Or if I had enough sense to know that, to work as a press-fit, the holes need to be tapered, and therefore direction of application is important. I soon realised though, when my pseudo-press bent the plate instead of pressing it on. I straightened it in the vice (should be OK as all strain is lengthways) and resolved to try again later or maybe borrow the right tool from my mate Roly if he's got one. Sometimes it's best to take a breather and re-group.

I'm feeling very up because the project has so much momentum now. I need to ring a seatmaker.....


Forza Ducati! Roll on Silverstone and Catalunya!

Saturday, 16 April 2011

At last my custom painted tank is here...

Don from Boyz Toyz has done a stunning job. As ever it is difficult to capture the colours as they appear to the naked eye. However the white is just right, not at all fridge like but not at all cream. The metallic red is rich and not orangey and the metallic green is very dark looking almost black until the light hits it. Tricolore a la hot rod, not a pizza box in sight! To my mind at least, it has the retro motorsport look I wanted and I am stoked. No more words needed:


This is all the inspiration I need to solve the remaining pieces of the puzzle. All thanks be to The Force : )

Monday, 11 April 2011

Anticipation is the greater part of pleasure......AAAARGH!

Friday I had the day off, the plan being to go and get my newly painted tank and see if the Piaggio white with metallic green and red stripes thing was working. I got a call from the paint shop on Thursday to say it wasn't going to be quite ready for Friday and rather than changing my leave dates again, decided that Mrs Cutter and I would take the Firestorm and her 695 to the coast - the beautiful  Aldeburgh. There are so many lovely winding country lanes between Aldeburgh and London. Friday morning dawned bright and sunny, and as we were about to leave later in the morning, I got a call to say the tank would be ready after all. However, there was no way I was going to mess Mrs Cutter around and waste a bright sunny blue-sky day riding in a car.

Bikes are about riding right? The tank would have to wait......gnnngrhhuuurggh! However getting the tank next day, which would mean not thanking Don in person but picking it up from the polisher, was not possible as I was meeting old Univ. mates, including one I haven't seen for over twenty years (all sometime bikers and/or musicians natch). And so here I sit knowing the tank's ready, but not knowing what it has turned out like. I am guessing from Don's repeated comments about being more than happy for it to be seen around the paintshop for a week or so, that it's looking fantastic. Current plan is to get it next Saturday morning, prior to prepping for a gig that evening...

In the meantime, 916 clutch master cylinder arrived and was fitted with Venhill hose to Oberon slave cylinder, and fitted with Oberon adjustable lever. At some future date Factory Racing anodised reservoirs may tidy the cockpit looks up. I know the original coffin master cylinders are more retro and tidier, but I love the sports look of remote reservoirs, and the stock units were fouling the clip-on brackets so there we go:


I now have a working clutch! I have a failed delivery card from the postie so hopefully the 916 brake master is at the depot, will check today.


Other progress and general good news - high spec Motobatt battery arrived. It's got 20% extra cranking power and a good rep for being long lived and resilient. Makes me feel better about not being able to afford an ultra lightweight Lithium Ion job at the moment.
The best thing about the new battery was that I was able to turn the motor over on the starter. So what you say? Well this demonstrated in one fell swoop that my clutch push rod and new pressure  plate assembly works, the cleaned and re-built starter motor works, and with clutch out the front sprocket rotated anticlockwise which, as it's on the left hand side of the bike is the correct direction to indicate that....THE SPRAG IS IN THE RIGHT WAY 'ROUND!!! Jeeez what a relief.

Other stuff, am waiting on exhaust shims which will allow me to fit exhaust and start fabricating rear support brackets. Have LEDs for two extra warning lights not catered for in speedo - but they sent me a white one instead of a red one... Next biggie is design and sort the seat re-cover and possible re-shape.


 Oh yeah and left side rearset on and working. Things are gathering speed friends...

Monday, 4 April 2011

On It's Wheels!

This is very premature and I will probably regret it, but I just couldn't resist. The project has got real momentum at the moment and I really wanted to see the bike on it's wheels. The kids helped me get it off the table safely. With luck I may even have the painted tank by the end of this week. It's scheduled to be ready to pick up on my birthday but I have to confirm tomorrow. If the plan sticks I will be so happy.


In other news. Rear brake with new Venhill hose, rearset brake controls including banjo brake light switch all fitted. However brake switch a little too long so utilising double copper washers which is not ideal.


Continued struggling to keep the PJ1 exhaust paint on long enough so it survives relatively unscathed until engine is run to cure it. Our oven's not big enough, although I did have another go, this time with electric heat gun rather than blow torch.

Bit pathetic so roll on engine running - way off yet though.

Having discounted professional electrician to do tidy job on dash due to cost, I am running out of excuses to put off wiring it in.... Got to start sorting seat covering choices too which will be fun.

Not The Approved Method (or "Clown over Matter")

As some of you may have noticed, my version of a hydraulic bike bench (to raise a motorcycle to an ergonomic height for working on) with a further jack or stand securely mounted on it (to further raise the bike off it's wheels when on the bench) is a coffee table. Not just any coffee table, but a shagged-out one rescued from a skip, constructed from some toxic exotic wood, supplemented with a few bits of pine block and board, some nailed carelessly to the top. It gives the miser in me, and the spirit of my can-do ancestors, great pleasure to utilise only equipment that would look at home in a Brothers Grimm tale.

On Sunday I had a sudden urge to put the front wheel in and let fate decide how the bike would get off the table.


During that process the inevitable happened. The bike, which has been teetering for weeks, fell over away from me as I fiddled with the front wheel while sitting on the floor. Toward me would have been worse. Through some fluke, and due to the centralised mass of the engine on which the whole thing was pivoting, even though it fell to an angle of about 80 degrees, I was able to counterweight it easily but not move, or remedy the situation. As I was about to reach for my phone and alert the youngest Cutter offspring, I noticed that said Cutter-ette was looking out of the window at me, so I gestured in a desperate fashion and together we got the thing upright. Sufficient to say I was determined not to learn my lesson, and not ten minutes later the front wheel went rolling across the garage floor as though determined to fall and damage a disc rotor. As I groped for it ineffectually it came to rest gently contacting the world only through the medium of rubber.

Due to mistakenly thinking I was missing a spacer, I resentfully changed tack and started thinking about mounting the Motogadget Tiny speedo. I knocked up a simple bracket, and this proved to be all that was going to be necessary, stylistically as well as functionally. I'd though I would have to make a small alloy dash as the new speedo only has four warning lights hidden in it's face and I need more. But it seemed a shame to take such a minimalist little gauge and put it in an acre of alloy plate.

The speedo will handle indicators, high beam, neutral and oil pressure. That leaves side-stand warning, low fuel (there is no gauge or reserve on an M900) and charging light. I can probably live without the side-stand light as it has a cutout anyway. So I've ordered two LED's in bezels that I hope will mount stealthily in my very mimimalist bracket, under the speedo itself.

This bracket may prove to be just a prototype, but it cheered me right up seeing the speedo mounted. I'm still anxious about the wiring job to come, and I was grumpy about what I thought was missing spacer for the front wheel slowing my headlong plummet toward destiny.

Today I realised there was no spacer required, it's function is carried out by a shoulder on the front axle. Time to enlist fate again. The coffee table is birthing a healthy sprog but it's a complicated labour, and not by the approved method:


I think I have reached a point where an assistant is required again. I'll let y'all know when she gets down off the operating table safely, but in the meantime it's so damn good to see her with wheels on. Remember don't try this at home, yours or anyone else's.....

Wednesday, 16 March 2011

I love this bloke..

Adam Cramer reminds me of Jim Campilongo - in fact what Campilongo is to guitar this guy is to bikes and wrenching:


Handmade Portraits: Liberty Vintage Motorcycles from Etsy on Vimeo.

Reblogged from the excellent Pipeburn at:
http://www.pipeburn.com/home/2011/3/11/video-liberty-vintage-motorcycles.html

The great, intelligent, eccentric, passionate, obsessive American male spirit in full effect... Something we don't always remember exists from across the pond.

In fact what the hell:


Excuse the cheese, this guy is golden. A teacher and he doesn't care whether you get it when he goes "off-piste". That's a mark of the Greats, any fule kno that.

See here/hear also:

http://www.youtube.com/watch?feature=player_embedded&v=5FA4EYr1VJ0#t=0s

Nuff said...

Thursday, 10 March 2011

Looking back on a week in 'shackland...

So I'm back at work feeling that I have something to sustain me - a week doing project-related stuff was good for the soul. I made some stupid mistakes and then rescued them. I spent a lot of time pottering around. I had previously drained my tank and left it out to air for two days in order to lose lethal explosive fumes prior to transportation. As you can see Mrs Cutter felt it prudent to take shelter in the cluckbunker while I drained the fuel. The chooks had more faith...

The net is full of every warning, technique, argument, superstition, example, confusion and revelation you could imagine about dealing with petrol fumes in tanks; baking, dry ice, pumping with exhaust fumes, washing with water, detergent, acetone, thinners, blood of virgin jellyfish, incantations, dances, prayers, stuffing with tribbles or guineapigs dressed as tribbles. You name it there's a contradiction to it. In the end I thought; air it right way up for a day, wrong way up for a night, and on it's sides for a day/night. Sniff it. Fall over. Lock it in the boot. Warn the painter to warn the welder that a fool delivered it.


I visited Don at Boyz Toyz taking the tank and my designs in the car. What a gentleman - really friendly and helpful, and he even brought my phone back to life....  Yep the industrial estate where he's based is a bit of a bomb site, and as I opened the car door - PLOP! - phone makes a death dive bid-for-freedom into six inches of muddy water. I never would have believed  it could survive it, but it's fine after he applied his compressed air line to it, though the slide action is still a bit gritty. We talked about Ducati's at length as he's an air-cooled ducati nut too, and we worked through the colour swatches and the striping.

That night I was tossing and turning, had I really taken enough care picking the colours? As a friend pointed out, I hadn't seen the swatches in daylight only artificial light. Oh well, forecast was cold but sunny and the Firestorm needed a blat. I was on hols after all. The sun didn't arrrive until much later and I froze my butt off, especially as I took the wrong lane in some roadworks that dumped me past the right junction. I had been there the day before but still needed a warm evil McD and the fantastic googlemaps GPS implementation on my phone. Section 1. eat chips, Section 2 turn left and after 2.5 metres push, don't pull door, etc etc. The fact that you can type in just the name of a custom bike painting firm based in an estate mainly made up of old containers, and get precise directions is something to behold. What we take for granted these days is unbelievable. Science still a bit slow in coming up with immortality mind...

Don wasn't that suprised to see me, I think he's seen it all. I met a nice bloke there who was picking up bodywork from a previously white and blue 1800 Suzuki techno-muscle cruiser. He'd had Don spray it up in satin black with stealth artwork that only showed up at certain angles. WIth his moral support, I decided the colours I'd picked for the stripes were right, and spotted a Piaggio scooter Don was working on that had the right shade of vintage white for the base colour.

That night I was tossing and turning......had I really, really, I mean really, picked dark enough stripe colours to avoid the pizzabox effect? Mrs Cutter was now fixing to put one or other of us out of our misery....

Yes! I decided that even if the rich metallic green and red where more traditional than I had planned in their greeness and redness, I had faith that it was going to look very cool. The black frame and wheels would mitigate the Luigi's Deli sun canopy effect.

Then I tossed some more (they can't touch you for it you know), and I turned some more. Shite! Did Don think the drawings I gave him were totally accurate in terms of stripes being 90 degrees to actual tank mounting position??  A monster tank has every angle and curve you can think of on it somewhere. The next morning I rang him and did everything I could to assure him I wasn't some kind of paint-shop stalker. A discussion then ensued about taking reference 90 degree angles from fuel cap and original logo. I would get a call if this didn't sort it out, and would then have to collect tank and photograph in situ, on the frame sitting on it's wheels. I never got that call, so hopefully everything is fine. Turnaround is up to about 3 weeks, (including welding up the hinge plate on the base to cure the rust problems) so I am just waiting in great, great, anticipation. In the meantime a polished alloy, race-style keyless gascap has been ordered...

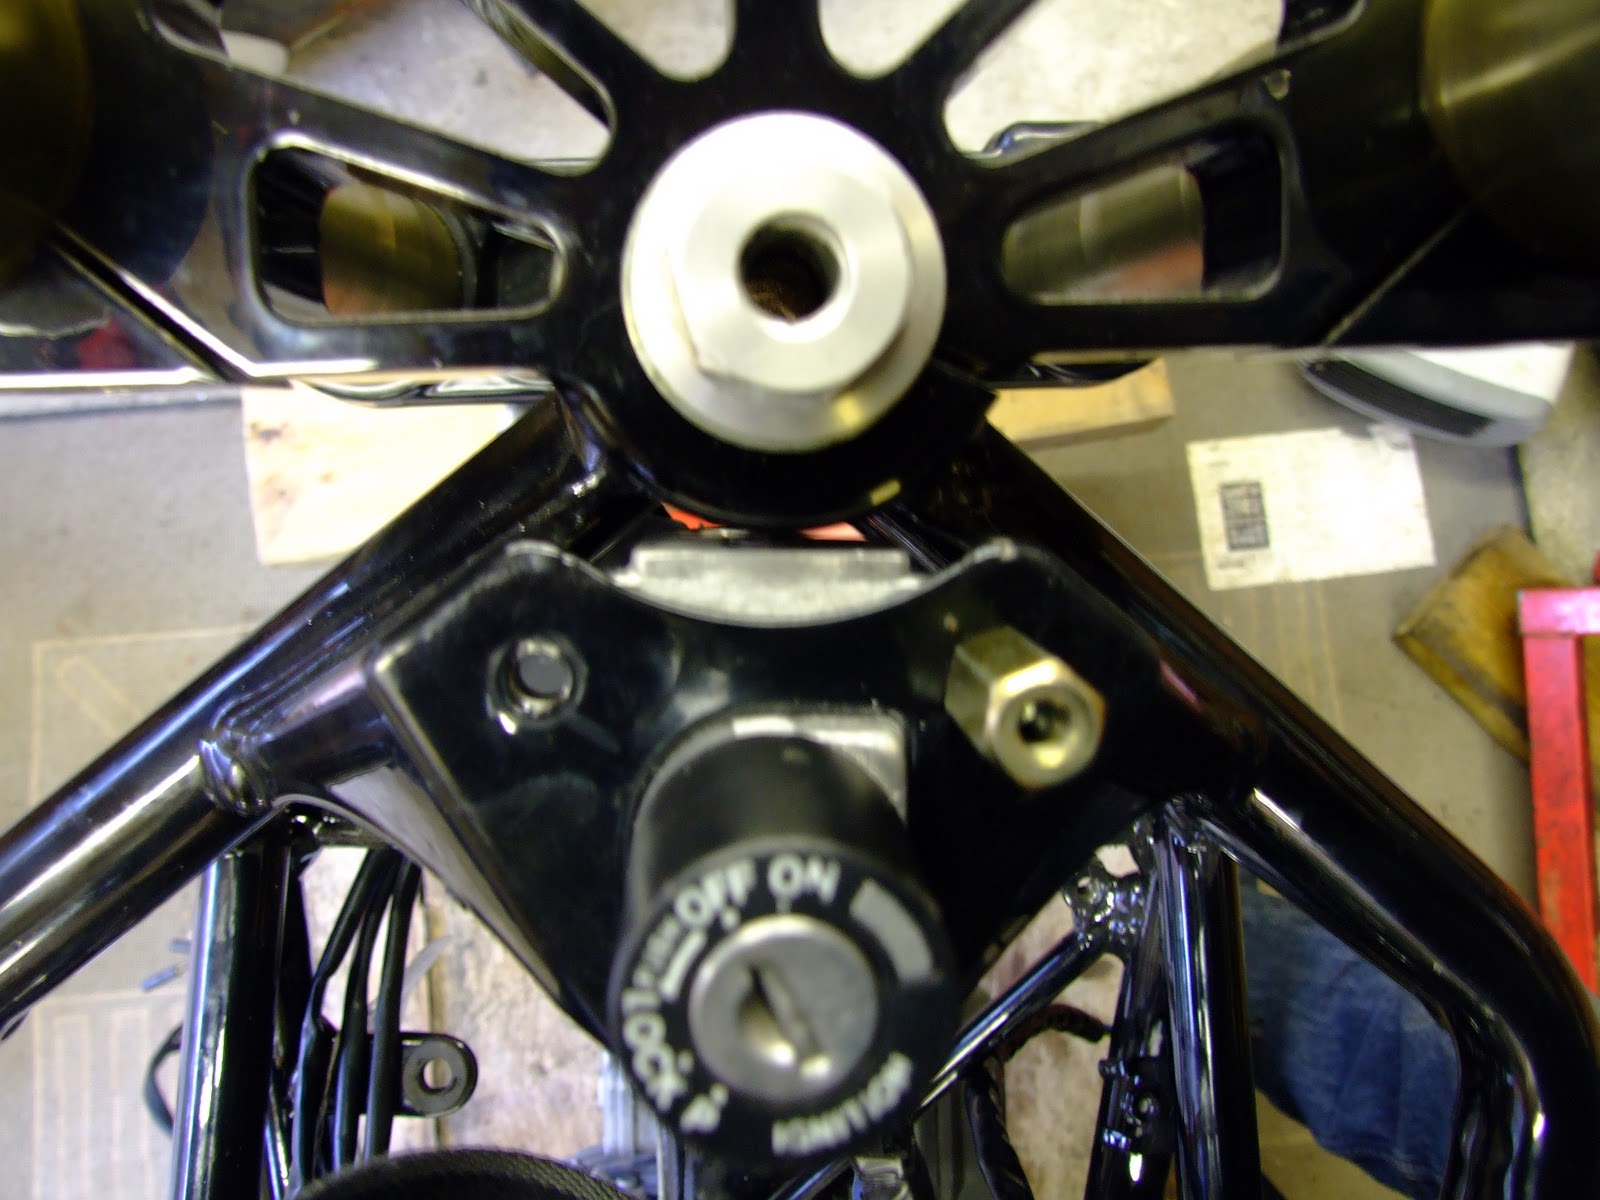
I started work on mating the airbox to the Keihin carbs. I had to do some cutting mentioned in the instructions. I had to do some cutting not mentioned in the instructions, or by anyone else ever as far as I could see. But then again, (and excuse the diversion from the carbs here, we'll get back to that in just a while), I thought I was the only one who had problems with a Cyclecat top yoke rubbing against ignition key block. That is until I researched some old posts on UK Monster Owners forum by a gent who inspired me with his blog right back at the beginning m900.blogspot.com. He mentioned in a forum post that a few 900s from around '95 to '97 had the frame mounting for the ignition in a slightly different place, so I was not alone. I ground the offending face, which includes the steering lock bolt, down a couple of mm. and it now fits fine.


Back to the carb/airbox union. I won't go into the full embarrasing details. Suffice to say that some cutting, and some hot gluing, and some foam, have allowed clearance for the carbs. This without totally obliviating the purpose of the K&N filter, and all the gasket and sealing gubbins, and other malarky that could have been wasted due to a fool and his 3000rpm hole saw.


In a medical analogy, it wasn't that that the surgeon cut off the wrong leg - no, no, it deffo needed to come off. It was just that while he was doing it he thought he was cutting off an arm. 'Nuff said. It all came together in the end. We'll see if the extra "intakes" affect performance further down the line:


Most of the rest of the week was spent trying to persuade the loom to go back in place in a slighty less visible way than it did originally. The project referenced above did this in a very precise and sublime way. I am not even going to think about achieving the same level of tidyness, as this continues to be a quick and dirty build. Well dirty anyway. The tango with the loom is given added spice by the fact that half of it is joined to the top of the air/battery box where the coils and ignition modules live. The other half has to fit under and around said box. Meanwhile the box and rubber unions have to be pressed unwillingly down on the carb manifolds squashin' said wiring and confusing and tangling it with fuel lines. This is stuff I hate and am crap at. Therefore I am doing it at a rate of five cups of tea per strand of wire, divided by the square root of the total sum of cable-ties, to the power of 10 trips to the loo with a bike mag.


Notice ID tags for wiring, most of which have now fallen off. The task is not complete. But I have faith. I am going to carry on low and slow. I'm going to meander it into place. Yep, a week in the shed endeth and the lesson is moderation in all things, including moderation itself. I haven't been back for a few days. And when that tank returns - all being well - I will be super-motivated. My mantra "there still lots of scary stuff to do" endures, but in the end, in the words of my keyboard player "it's going to be badass!"

Thanks to my good friend Shaun  for sorting out tickets for Maceo Parker last night, now that really was badass.....